Showing posts with label savory. Show all posts

Monday, November 21, 2011

Cooking for my Bestie


A few weeks ago I visited my best friend, Ruchi in St. Louis, where she attends med school. We checked out the gorgeous fall foliage, ate frozen custard, went on a brewery tour at Anheuser-Busch, attended a lovely Thanksgiving potluck and even attended a boot camp class. The trip was especially fun since I lived in St. Louis for a few years when I was in junior high but haven’t been back in years, so everything felt both familiar and new at the same time.

18 years of friendship 

While I was there, I had a few opportunities to play in Ruch’s kitchen. For the Thanksgiving feast I made my brownies (by request) sprinkled with sea salt. The second dish was a bit more of an adventure…

The life of a medical student is pretty much filled with studying, class, and more studying, so I decided to save Ruch some time by making her food for the week. The requirements? Healthy, vegetarian and preferably with veggies. Also, whatever she happened to have with her kitchen. I ended up making something that was healthy, filling and colorful that looked and smelled as delicious as it tasted. I enjoyed it when I came home I recreated it in my own kitchen. And best of all? It’s easy. Recipe and photos after the jump. 

Friday, October 7, 2011

My Version of the Family Spaghetti Recipe

Most families have those recipes—the ones that are passed down from generation to generation and remind you of your childhood. This is one of my favorites from my family’s cookbook. Like many family recipes, much of it is to taste, which means it will come out slightly different each time (which is part of the fun). As a kid, my mom made this recipe as a casserole, baking the contents with cheese and olives. For my version, I try to health it up a bit by using extra-lean ground beef (ground turkey is another healthier option) and whole wheat spaghetti. I also skip the cheddar cheese (although I do sometimes add fresh grated parmesan to the top). It’s hearty, delicious and easy to put together. It also tastes great the next day, as the noodles get a chance to absorb the flavors of the sauce…my ultimate comfort food.


What you need…
  • 1 lb. extra-lean ground beef (or turkey)
  • 1lb. whole wheat spaghetti
  • 1 large can crushed tomatoes
  • 1-2 small can(s) tomato sauce
  • 2 bay leaves
  • Salt
  • Pepper
  • Chili Powder
  • Cumin
  • Garlic Powder
  • Oregano
  • Basil
  • Freshly grated parmesan (optional)

What to do…
  • Cook pasta by directions on package, drain and set aside
  • In large skillet, brown and crumble meat
  • Drain grease from skillet
  • Add crushed tomatoes to skillet and simmer
  • Add bay leaves
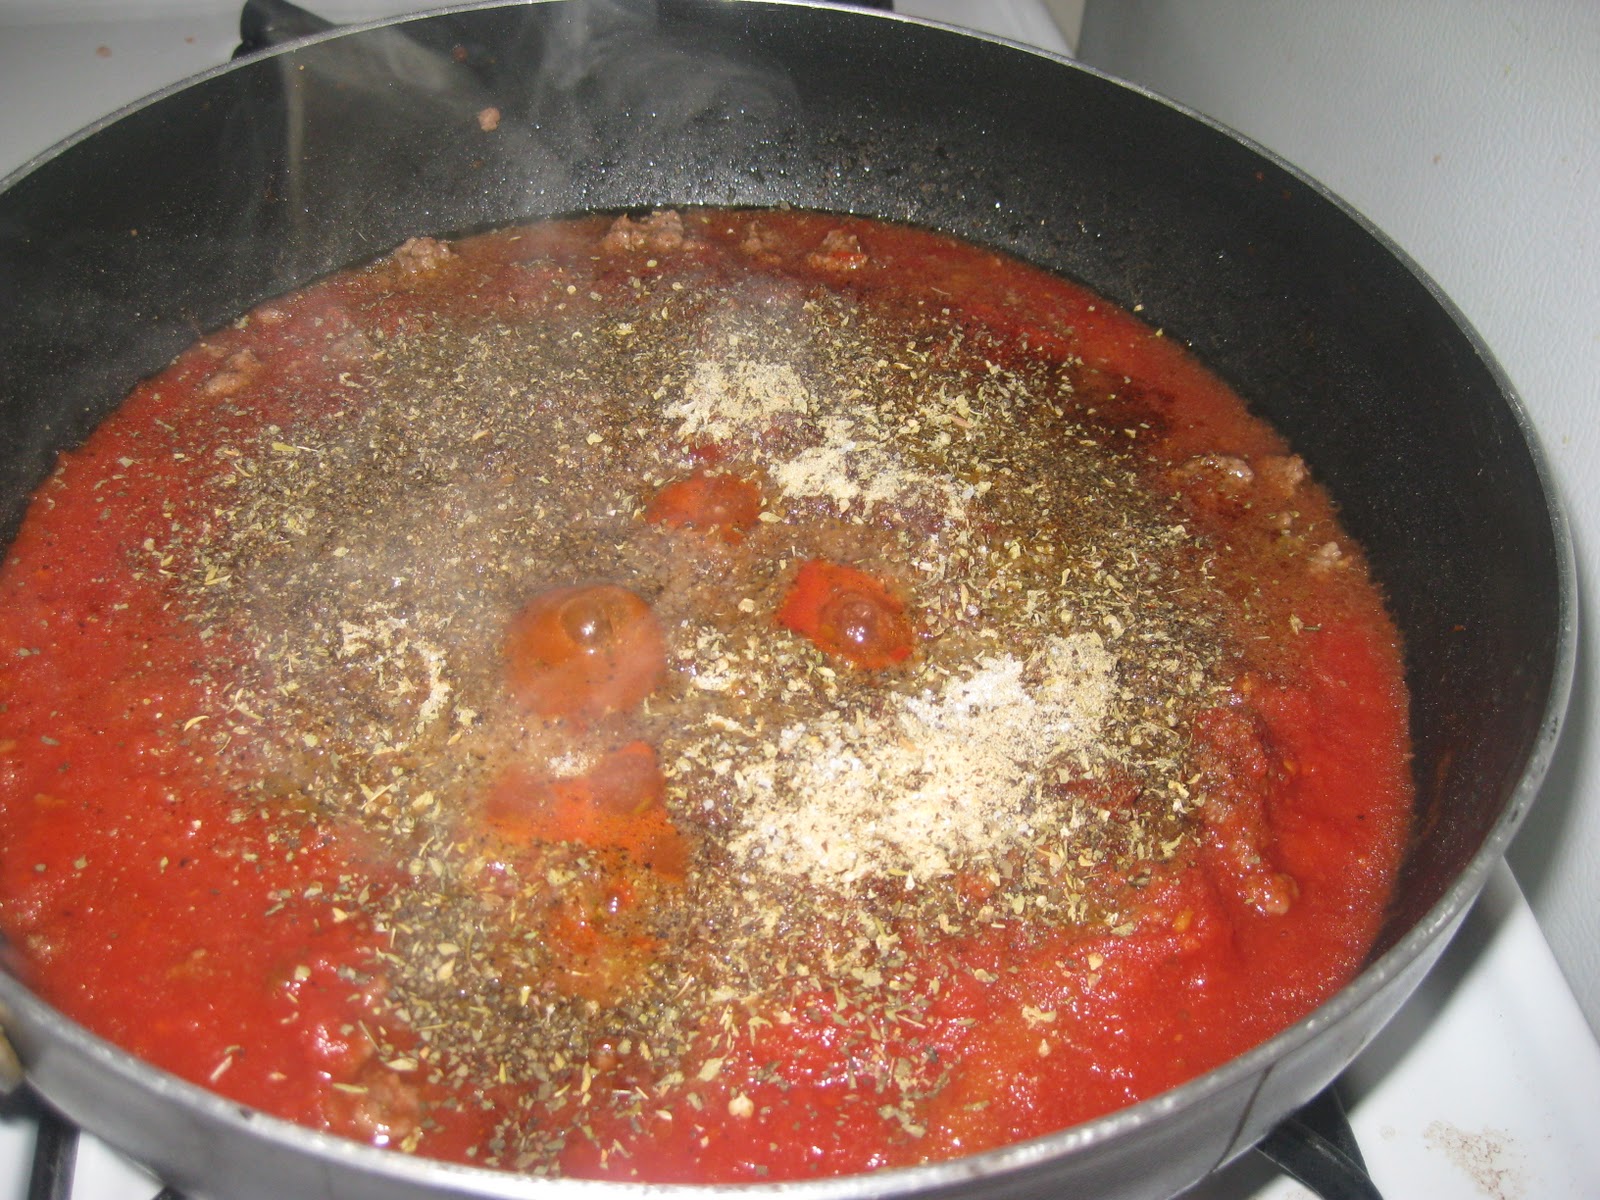
  • Add salt, pepper, chili powder, cumin, garlic powder, oregano and basil to taste
  • Simmer sauce for about an hour. When sauce starts to become too thick, add one or two cans tomato sauce and continue simmering until desired texture and taste are reached
  • In a large pot, combine sauce and pasta
  • When serving, top with freshly grated parmesan (optional)
All the ingredients that make the sauce so tasty


Round of spices

Simmering sauce

Ready to eat!

Friday, September 2, 2011

Whole Wheat Garlic Knots


As many of you will most certainly know, I think Joy the Baker is pretty rad. So, when Tracie (of Tracie’s Tastie Treats) and I were searching for something new to make, her blog was an obvious choice. On this particular day, our usual sweet fare just wasn’t appealing to us, so we decided to venture into the savory with these Whole Wheat Garlic Knots. The process of making the knots was fun, and they ended up looking very pretty. They were great on their own, but found they paired beautifully with my homemade spaghetti (post coming soon). I have to admit, stepping into the world of savory baking made me feel pretty legit. Enjoy!


Whole Wheat Garlic Knots (from Joy the Baker)

What you need…

·         1 package active dry yeast, about 2 1/2 teaspoons
·         1 cup warm water (just warmer than body temperature)
·         1 cup whole wheat flour
·         1 1/2 cups all-purpose flour
·         2 tablespoons olive oil
·         1 teaspoon sea salt
·         2 teaspoons sugar
·         For the garlic mixture:
·         4 to 6 cloves garlic, peeled and minced
·         2 tablespoons melted butter
·         2 tablespoons olive oil
·         1/4 cup chopped parsley
·         1/2 teaspoon sea salt
What to do…
1. In a small bowl, dissolve yeast and sugar with warm water.  Let sit for 5 minutes until yeast is frothy.  That means it’s alive and ready to go.
2. In a large bowl, whisk together flours and salt.  Create a small well in the center of the flour mixture.  Pour in the yeasty water and add oil.  With a fork, mix the wet ingredients into the dry ingredients.  If the dough is too sticky, add more all-purpose flour.  Dough should be slightly sticky, but not stick to your hands too much.\
3. Knead dough on a lightly floured surface for about 5 minutes.  Place dough in a large greased bowl.  Flip the dough over to coat the dough.  Cover with plastic wrap and a clean kitchen towel, and leave to rest in a warm, draft-free place for 1 hour, or until the dough is doubled in size.  At this point, you can make the garlic knots, or let the dough rise in the refrigerator overnight.  Just bring the dough to room temperature before rolling it out.
4. When ready to prepare the garlic knots, roll out dough on a lightly floured surface.  Roll into a 10-inch by 10-inch square.  Roughly…. it doesn’t have to be perfect.  Use a pizza cutter to slice 10 1-inch stripes.  Tie a knot in the center of the dough, and wrap the ends under and around the knot.  This doesn’t have to be perfect either… just make sure that the dough is all tucked into itself.  Cover with clean kitchen towel and let rest for 30 minutes.
5. Place racks in the center and upper third of the oven and preheat oven to 400 degrees F.   Line two baking sheets with parchment paper.  Place dough knots on prepared baking sheets and bake for 15 to 18 minutes, until golden brown.
6. While bread bakes, in a large bowl whisk together minced garlic, butter, olive oil, parsley and salt.  When rolls come out of the oven, immediately toss them in the garlic butter mixture.  Toss until coated and remove from the butter bowl.  Serve rolls warm.
Rolls are best served the day they’re made, but will last for 3 days if well wrapped.  Just reheat in a piece of foil in a 350 degree F oven for 10 minutes.
Tracie and I seem to always bake with wine...

...and cheese

Kneading the dough

Pre-baked garlic knot

Butter, garlic and parsley? Yes, please.

I'm not gonna lie, these are some pretty sexy garlic knots


Friday, April 8, 2011

Something Fishy Going On

I absolutely love seafood, but have always been hesitant to make it myself. However, after trying this recipe from Food Network Magazine, I am more open to trying to prepare seafood more often. This recipe has a lot of steps (and unfortunately dirties a lot of dishes) but it is really tasty. I will definitely try this recipe again!


Tilapia Milanese (Modified from Food Network Magazine, March 2011)

What you need…

  • 4 6-oz tilapia fillets
  • 1 ½ cups milk
  • 1 cup all-purpose flour
  • Kosher salt and freshly ground pepper
  • 3 large eggs
  • 2 cups panko bread crumbs
  • 1/3 cup fresh parsley leaves, chopped
  • Finally grated zest of ½ lemon, plus lemon wedges for serving
  • 5 to 6 tablespoons extra-virgin olive oil
  • 4 tablespoons butter

What to do…

  1. Preheat the oven to 450 degrees F. Soak the fish in a bowl with the milk and 2 cups ice for 15 minutes. Meanwhile, mix the flour with ½ teaspoon each salt and pepper in a shallow dish. Lightly beat the eggs in another dish. Mix the panko, parsley, lemon zest and ½ teaspoon salt in a third dish.
  2. One at a time, remove the fillets from the milk and dredge them in the flour, shaking off the excess. Dip in the eggs, then coat with the breadcrumbs, gently pressing to coat both sides. Transfer to a large plate.
  3. Line a baking sheet with foil. Heat 2 tablespoons each olive oil and bitter in a large skillet over medium-high heat. Add 2 fillets and cook until golden, about 3 minutes per side. Transfer to the prepared baking sheet. Repeat with the remaining 2 fillets, adding 2 more tablespoons each olive oil and butter. Transfer the fish to the oven and bake until cooked through, about 8 minutes. 
Soaking in milk

Breaded and ready to go into the pan

Here goes nothing!

Golden brown and delicious

Saturday, January 22, 2011

Pasta with Creamy Red Pepper-Feta Sauce


After all the excesses of the holiday season, I was in the mood for something healthy to balance myself out. Since I love both red peppers and feta, I figured this pasta would be a pretty safe bet. I actually found that the sauce was a bit oniony the night it was made, but that element mellowed out overnight and ended up being quite lovely. Mixing in some steamed broccoli is also a nice way of amping up the nutritional value of the meal.

Pasta with Creamy Red Pepper-Feta Sauce (from Ellie Krieger)

What you need…
  • 2 tablespoons olive oil
  • 1 small onion, chopped
  • 2 to 3 garlic cloves, peeled and chopped
  • 1 (16-ounce) jar roasted red peppers, drained and chopped
  • 1/2 cup low-sodium chicken stock or vegetable stock
  • 1 cup crumbled feta cheese or a 6-ounce block
  • 1 pound whole-wheat pasta (the original recipe calls for fettuccine, but I couldn’t find whole wheat organic spaghetti)
  • Salt
  • Freshly ground black pepper
  • 2 tablespoons chopped fresh parsley leaves
What to do…
Heat the oil in a heavy skillet over medium-high heat. Saute onion and garlic until soft, about 10 minutes. Add roasted peppers and saute until heated through. Remove from heat and let cool slightly. Place mixture in the bowl of a food processor with stock and all but 2 tablespoons of the feta. Process until combined and smooth, about 30 seconds. Cook pasta according to package directions. Drain, reserving 1/2 cup pasta water. Toss pasta with sauce, adding pasta water by the tablespoon, if needed. Sauce should cling nicely to pasta. Season with salt and pepper, to taste. Sprinkle with parsley and remaining feta cheese.

Each time I chop an onion I get a little bit better...

Finished product!
 

Friday, December 17, 2010

Return from hiatus with a childhood favorite


Between moving and having my computer die, I have been M.I.A. from here longer than I was expecting. However, with my return I would like to share with you my absolute favorite thing (and pretty much the only form of veggies I would voluntarily eat) as a child. Serbian Spinach Casserole is warm, comforting and delicious. It pairs nicely with ham for a holiday meal or makes a good vegetarian main dish. It also keeps well and is tasty both hot and cold. As a bonus…it’s super simple!

Serbian Spinach-Cheese Casserole

What you need…
2 one-pint cartons cottage cheese (I use low-fat)
6 eggs
6 tablespoons flour
1/8 lb. salted butter in coarse pieces
1 block cheddar cheese (I use low-fat), grated
1 package frozen chopped spinach, cooked and drained
What to do…
Mix all together in a large bowl. Bake in well-greased baking dish at 325 degrees for one hour. 
Yummy :)


Sunday, October 17, 2010

Quick Stovetop Chili

It's been a hectic week here so I haven't had the time or energy to spend in the kitchen. However, last week I did manage to make some healthy chili, modified from Ellie Krieger. As I mentioned before, I sometimes have to force myself to eat veggies, so I decided to double the amount of carrots and red bell peppers in the chili, in order to up the nutritional value. This is also a good way to incorporate more protein in my diet, with the extra lean ground beef and variety of beans. Pour over whole grain spaghetti and top with lowfat cheddar cheese to make a complete meal!

What you need...
  • 1 tablespoon olive oil
  • 1 onion, diced (1 cup)
  • 2 red bell peppers, diced (2 cups)
  • 4 carrots, diced (1 cup)
  • 2 teaspoons ground cumin
  • 1 pound extra-lean ground beef
  • 1 (28-ounce) can crushed tomatoes
  • 2 cups water
  • 1 chipotle chile in adobo sauce, seeded and minced
  • 2 teaspoons adobo sauce from the can of chipotles
  • 1/2 teaspoon dried oregano
  • Salt and freshly ground black pepper
  • About 2 teaspoons garlic powder
  • 1 (15.5-ounce) can black beans, drained and rinsed
  • 1 (15.5-ounce) can kidney beans, drained and rinsed
  • 1 (15.5-ounce) can pinto beans, drained and rinsed
What to do…
Heat the oil in large pot or over moderate heat. Add the onion, bell pepper and carrots, cover and cook, stirring occasionally until the vegetables are soft, about 10 minutes. Add the cumin and cook, stirring, for 1 minute. Add the ground beef; raise the heat to high and cook, breaking up the meat with a spoon, until the meat is no longer pink. Stir in the tomatoes, water, chipotle and adobo sauce, oregano, garlic powder and salt and pepper. Cook, partially covered, stirring from time to time, for 30 minutes. Stir in the beans and continue cooking, partially covered, 20 minutes longer. Season, to taste, with salt and pepper.

Sunday, October 3, 2010

Healthy Yummy Mac n Cheese

It's a bit ironic that my first food post isn't dessert but sometimes I have to eat real food too. Despite my love of all things involving sugar and butter (or perhaps because of it), when I make food for meals, I tend to cook as healthy as possible (and delish, of course). Since I love mac n cheese and I have issues incorporating enough veggies in my diet, this recipe does double duty. Although there is much more squash in it than cheese, the cheese flavor is really what shines in this dish. I usually make a big batch and then take it to work to make sure I'm eating balanced during the day. So, without further ado...
Healthy Yummy Mac N Cheese (modified from Ellie Krieger)
What you need…
  • Cooking spray
  • ~1 1/2 lbs. whole wheat rotelle pasta
  • 2 (12oz) packages frozen squash
  • 2 cups nonfat milk
  • ~6oz extra-sharp Cheddar, grated
  • ~4oz low fat Monterey Jack cheese, grated
  • 1 teaspoon salt
  • 1 teaspoon powdered mustard
  • 1/8 teaspoon cayenne pepper
  • 2 tablespoons grated Parmesan
  • 2 tablespoons unseasoned bread crumbs
  • 1 teaspoon olive oil
What to do…
Preheat the oven to 375 degrees F. Coat a 9 by 13-inch baking pan with cooking spray.
Bring a large pot of water to a boil. Add the macaroni and cook until tender but firm, about 5 to 8 minutes. Drain and transfer to a large bowl.
Meanwhile, place the frozen squash and milk into a large saucepan and cook over a low heat, stirring occasionally and breaking up the squash with a spoon until defrosted. Turn the heat up to medium and cook until the mixture is almost simmering, stirring occasionally. Remove the pan from heat and stir in the Cheddar, Jack cheese, salt, mustard and cayenne pepper. Pour cheese mixture over the macaroni and stir to combine. Transfer the macaroni and cheese to the baking dish.
Combine bread crumbs, Parmesan and oil in a small bowl. Sprinkle over the top of the macaroni and cheese. Bake for 20 minutes. Then broil for 3 minutes so the top is crisp and nicely browned.


The milk and squash mixture (pot circa 1970)

Mmmm...cheese


Topping mixture

Finished product