Tuesday, November 29, 2011

Pop-Up Shop Pictures and New Event Announcement

I'm pleased to say that {Sweet Fancies} Pop-Up Shop in the Park was a success! We had an amazing time and thank the family and friends who came out to support us and hang out with us at our first pop-up shop! Once the weather warms back up, we are definitely planning on doing more. If you missed {Sweet Fancies}, fear not! Gypsy Dust Vintage and I will be selling our goods at Glenview Elementary's Holiday Bazaar in Oakland. The event will take place at the school on Friday, December 9th from 3:00-7:00pm. I have not finalized my menu but we will definitely have some brownie bites, cookies and mini cupcakes. Hope to see you there!

Also, be sure to like Bombshell Baking on Facebook and follow @BombshellBaking on Twitter!


Delicious baked goods in a beautiful park? Yes, please!

With Katie-Lyn of Gypsy Dust Vintage

Oatmeal Chocolate Chip Cookies, Molasses Spice Cookies, Sea Salt Brownie Bites and Mini Pumpkin Ginger Cupcakes with Lemon Cream Cheese Frosting

Flowers, flour, butter and sugar

Our two shop set up

Gotta be cute


Monday, November 21, 2011

Cooking for my Bestie


A few weeks ago I visited my best friend, Ruchi in St. Louis, where she attends med school. We checked out the gorgeous fall foliage, ate frozen custard, went on a brewery tour at Anheuser-Busch, attended a lovely Thanksgiving potluck and even attended a boot camp class. The trip was especially fun since I lived in St. Louis for a few years when I was in junior high but haven’t been back in years, so everything felt both familiar and new at the same time.

18 years of friendship 

While I was there, I had a few opportunities to play in Ruch’s kitchen. For the Thanksgiving feast I made my brownies (by request) sprinkled with sea salt. The second dish was a bit more of an adventure…

The life of a medical student is pretty much filled with studying, class, and more studying, so I decided to save Ruch some time by making her food for the week. The requirements? Healthy, vegetarian and preferably with veggies. Also, whatever she happened to have with her kitchen. I ended up making something that was healthy, filling and colorful that looked and smelled as delicious as it tasted. I enjoyed it when I came home I recreated it in my own kitchen. And best of all? It’s easy. Recipe and photos after the jump. 

Wednesday, November 9, 2011

{Sweet Fancies} Pop-Up Shop in the Park: This Saturday!


Ever wanted to try some of the delicious things I've made here? Put in an order for the holidays? Check out some amazing vintage and handmade gifts? Come to {Sweet Fancies} Pop-Up Shop in the Park! My friend, Katie-Lyn (of Gypsy Dust Vintage) and I will be selling our goods in Codornices Park in Berkeley this Saturday, November 12th from 12-4pm. We will also be have some delicious samples. Hope to see you there!


Sunday, November 6, 2011

Happy Birthday to Me!


So apparently when you’re a baker, everyone gets you desserts for your birthday. There was a serious sugar situation at my house, in the most delightful of ways. Cupcakes, brownies, frosting, macaroons….so many sweets! And, a very special heart-shaped birthday cake by my friend, Angela (and her baking assistant, Danielle). Since the cake was assembled at my house, I had the privilege of witnessing her process in action. The cake is chocolate with an espresso frosting (yum!) topped with shaved coconut and fresh raspberries. Happy birthday to me, indeed!

Cutting the top heart

Shapes together

Frosting!

Mmmmm....raspberries

My birthday cake!

Friday, October 7, 2011

My Version of the Family Spaghetti Recipe

Most families have those recipes—the ones that are passed down from generation to generation and remind you of your childhood. This is one of my favorites from my family’s cookbook. Like many family recipes, much of it is to taste, which means it will come out slightly different each time (which is part of the fun). As a kid, my mom made this recipe as a casserole, baking the contents with cheese and olives. For my version, I try to health it up a bit by using extra-lean ground beef (ground turkey is another healthier option) and whole wheat spaghetti. I also skip the cheddar cheese (although I do sometimes add fresh grated parmesan to the top). It’s hearty, delicious and easy to put together. It also tastes great the next day, as the noodles get a chance to absorb the flavors of the sauce…my ultimate comfort food.


What you need…
  • 1 lb. extra-lean ground beef (or turkey)
  • 1lb. whole wheat spaghetti
  • 1 large can crushed tomatoes
  • 1-2 small can(s) tomato sauce
  • 2 bay leaves
  • Salt
  • Pepper
  • Chili Powder
  • Cumin
  • Garlic Powder
  • Oregano
  • Basil
  • Freshly grated parmesan (optional)

What to do…
  • Cook pasta by directions on package, drain and set aside
  • In large skillet, brown and crumble meat
  • Drain grease from skillet
  • Add crushed tomatoes to skillet and simmer
  • Add bay leaves
  • Add salt, pepper, chili powder, cumin, garlic powder, oregano and basil to taste
  • Simmer sauce for about an hour. When sauce starts to become too thick, add one or two cans tomato sauce and continue simmering until desired texture and taste are reached
  • In a large pot, combine sauce and pasta
  • When serving, top with freshly grated parmesan (optional)
All the ingredients that make the sauce so tasty


Round of spices

Simmering sauce

Ready to eat!

Thursday, September 29, 2011

Friday, September 2, 2011

Whole Wheat Garlic Knots


As many of you will most certainly know, I think Joy the Baker is pretty rad. So, when Tracie (of Tracie’s Tastie Treats) and I were searching for something new to make, her blog was an obvious choice. On this particular day, our usual sweet fare just wasn’t appealing to us, so we decided to venture into the savory with these Whole Wheat Garlic Knots. The process of making the knots was fun, and they ended up looking very pretty. They were great on their own, but found they paired beautifully with my homemade spaghetti (post coming soon). I have to admit, stepping into the world of savory baking made me feel pretty legit. Enjoy!


Whole Wheat Garlic Knots (from Joy the Baker)

What you need…

·         1 package active dry yeast, about 2 1/2 teaspoons
·         1 cup warm water (just warmer than body temperature)
·         1 cup whole wheat flour
·         1 1/2 cups all-purpose flour
·         2 tablespoons olive oil
·         1 teaspoon sea salt
·         2 teaspoons sugar
·         For the garlic mixture:
·         4 to 6 cloves garlic, peeled and minced
·         2 tablespoons melted butter
·         2 tablespoons olive oil
·         1/4 cup chopped parsley
·         1/2 teaspoon sea salt
What to do…
1. In a small bowl, dissolve yeast and sugar with warm water.  Let sit for 5 minutes until yeast is frothy.  That means it’s alive and ready to go.
2. In a large bowl, whisk together flours and salt.  Create a small well in the center of the flour mixture.  Pour in the yeasty water and add oil.  With a fork, mix the wet ingredients into the dry ingredients.  If the dough is too sticky, add more all-purpose flour.  Dough should be slightly sticky, but not stick to your hands too much.\
3. Knead dough on a lightly floured surface for about 5 minutes.  Place dough in a large greased bowl.  Flip the dough over to coat the dough.  Cover with plastic wrap and a clean kitchen towel, and leave to rest in a warm, draft-free place for 1 hour, or until the dough is doubled in size.  At this point, you can make the garlic knots, or let the dough rise in the refrigerator overnight.  Just bring the dough to room temperature before rolling it out.
4. When ready to prepare the garlic knots, roll out dough on a lightly floured surface.  Roll into a 10-inch by 10-inch square.  Roughly…. it doesn’t have to be perfect.  Use a pizza cutter to slice 10 1-inch stripes.  Tie a knot in the center of the dough, and wrap the ends under and around the knot.  This doesn’t have to be perfect either… just make sure that the dough is all tucked into itself.  Cover with clean kitchen towel and let rest for 30 minutes.
5. Place racks in the center and upper third of the oven and preheat oven to 400 degrees F.   Line two baking sheets with parchment paper.  Place dough knots on prepared baking sheets and bake for 15 to 18 minutes, until golden brown.
6. While bread bakes, in a large bowl whisk together minced garlic, butter, olive oil, parsley and salt.  When rolls come out of the oven, immediately toss them in the garlic butter mixture.  Toss until coated and remove from the butter bowl.  Serve rolls warm.
Rolls are best served the day they’re made, but will last for 3 days if well wrapped.  Just reheat in a piece of foil in a 350 degree F oven for 10 minutes.
Tracie and I seem to always bake with wine...

...and cheese

Kneading the dough

Pre-baked garlic knot

Butter, garlic and parsley? Yes, please.

I'm not gonna lie, these are some pretty sexy garlic knots


Wednesday, June 29, 2011

Sour Cream Lemon Pie

There are two things you may notice when reading my blog, the first being I really love citrus and the second, I really love baking with Tracie. Being that both Tracie and I love pie, we decided to try this refreshing Sour Cream Lemon Pie. It was pretty tasty goodness. We left off the whipped cream because, well, it’s overrated. We also used frozen pie crust, because sometimes you just want to eat the pie. And eat pie we did.


Sour Cream Lemon Pie (From Chaos in the Kitchen)

What you need…

• 1 9-inch pie crust
• 1 cup sugar
• 3 1/2 tbsp corn starch
• 1 tbsp lemon zest, grated
• 1/2 cup lemon juice
• 3 egg yolks
• 1 cup milk
• 1/4 cup butter
• 1 cup sour cream
• whipped cream, for topping (optional)

What to do…

1. Carefully pat pie crust into a pie dish and flute the edges. Prick all over the bottom and sides with a fork. Bake at 350°F abour 8 minutes or until golden brown (or follow the instructions on the package…hehe)
2. In a sauce pan combine sugar, cornstarch, lemon zest and juice, egg yolks and milk. Heat over medium, whisking constantly.
3. Cook filling until very thick, whisking constantly, about 10 minutes. Remove from the heat and stir in butter.
4. Allow filling to cool slightly, then stir in sour cream until well combined.
5. Pour filling into pie shell and refrigerate until completely cold and set.
6. Top with sweetened whipped cream before serving (or not)


Stirring

Filling

Choosing music while baking is very serious business

Tuesday, June 21, 2011

Baby D's Eggless Chocolate Cake

So, I know it’s been awhile (miss me?) but I have my energy and creative juices up and ready to start working again.

With that, my first offering is the lovely (pink) cake I made for my nieces birthday. As I’ve mentioned before, the little princess can’t eat eggs but a little thing like that is certainly not going to keep Ms. D from getting her dream birthday cake. DeeDee requested a chocolate cake with whipped cream frosting. And she wanted it pink. Needless to say, Auntie delivered.

The cake is very moist, but a little lacking in flavor. Next time I make this cake I’m going to add some cinnamon and chili powder to help make the flavor a little more interesting. The cake itself is vegan, so feel free to leave off the whipped cream or substitute a different frosting for a lovely vegan option. 


Recipe and more pictures after the jump 

Friday, April 8, 2011

Something Fishy Going On

I absolutely love seafood, but have always been hesitant to make it myself. However, after trying this recipe from Food Network Magazine, I am more open to trying to prepare seafood more often. This recipe has a lot of steps (and unfortunately dirties a lot of dishes) but it is really tasty. I will definitely try this recipe again!


Tilapia Milanese (Modified from Food Network Magazine, March 2011)

What you need…

  • 4 6-oz tilapia fillets
  • 1 ½ cups milk
  • 1 cup all-purpose flour
  • Kosher salt and freshly ground pepper
  • 3 large eggs
  • 2 cups panko bread crumbs
  • 1/3 cup fresh parsley leaves, chopped
  • Finally grated zest of ½ lemon, plus lemon wedges for serving
  • 5 to 6 tablespoons extra-virgin olive oil
  • 4 tablespoons butter

What to do…

  1. Preheat the oven to 450 degrees F. Soak the fish in a bowl with the milk and 2 cups ice for 15 minutes. Meanwhile, mix the flour with ½ teaspoon each salt and pepper in a shallow dish. Lightly beat the eggs in another dish. Mix the panko, parsley, lemon zest and ½ teaspoon salt in a third dish.
  2. One at a time, remove the fillets from the milk and dredge them in the flour, shaking off the excess. Dip in the eggs, then coat with the breadcrumbs, gently pressing to coat both sides. Transfer to a large plate.
  3. Line a baking sheet with foil. Heat 2 tablespoons each olive oil and bitter in a large skillet over medium-high heat. Add 2 fillets and cook until golden, about 3 minutes per side. Transfer to the prepared baking sheet. Repeat with the remaining 2 fillets, adding 2 more tablespoons each olive oil and butter. Transfer the fish to the oven and bake until cooked through, about 8 minutes. 
Soaking in milk

Breaded and ready to go into the pan

Here goes nothing!

Golden brown and delicious

Wednesday, March 30, 2011

Pie, Cheesecake, Wine and Deep Conversation

Baking can often be a really wonderful “me time” activity, one which allows me to push myself into trying new things, feel accomplished and, at times, even relax. However, sometimes it’s wonderful to try new things with a friend. My dear friend Tracie and I have made food a few times together before and it’s always a pleasure. On this particular day, we couldn’t decide between fruit pie and cheesecake, so we opted to do both. So among conversations of oppression and change and lots of red wine, we tried two recipes that were new to both of us. And, with Tracie cheering me on, I made my first homemade pie crust! Hooray!


More pictures and recipes after the jump…

Wednesday, March 9, 2011

Happy Birthday (cake), Angela!

When someone in my life has a birthday, it is automatically assumed that I will be making a cake (duh). When my dear friend Angela turned 26 in January, my first question was, of course, “what kind of cake do you want?” At her request, I found a light, fluffy white cake recipe and paired it with a whipped cream frosting and fresh strawberries. Not only was this recipe loved by the birthday girl and all of her guests, but it also marked the first time I successfully got stiff peaks in my egg whites (I was ridiculously excited)!


Recipe and more pictures after the jump…

Monday, February 28, 2011

The Cure for Chocolate Cravings

One night while sitting on the couch, I found myself craving something delicious, rich and chocolaty. Rather than whine about it or picking something up from the 7-11 down the street (ew) I decided to be a real problem-solver and googled myself some brownie recipes. I honestly picked this one because I had all of the ingredients handy in my kitchen. I don’t actually own a 8x8 brownie pan, so I just used a round cake pan instead, shortened the time and the brownies turned out beautifully (not having a certain pan is not going to keep me from brownies). I also cut the sugar a tad form the original frosting in order to create a richer, not overly sweet frosting. I was really happy with the result and will keep this recipe in my pocket for when nothing but chocolate will do. 


Best Brownies (modified from All Recipes)

What you need…

Brownies:
1/2 cup butter
1 cup white sugar
2 eggs
1 teaspoon vanilla extract
1/3 cup unsweetened cocoa powder
1/2 cup all-purpose flour
1/4 teaspoon salt
1/4 teaspoon baking powder

Frosting:
3 tablespoons butter, softened
3 tablespoons unsweetened cocoa powder
1 tablespoon honey
1 teaspoon vanilla extract
¾ cup confectioners' sugar
Water as needed

What to do…

Preheat oven to 350 degrees F (175 degrees C). Grease and flour a 9 inch round pan.
In a large saucepan, melt 1/2 cup butter. Remove from heat, and stir in sugar, eggs, and 1 teaspoon vanilla. Beat in 1/3 cup cocoa, 1/2 cup flour, salt, and baking powder. Spread batter into prepared pan.
Bake in preheated oven for 20 minutes. Do not overcook.

To Make Frosting: Combine 3 tablespoons butter, 3 tablespoons cocoa, 1 tablespoon honey, 1 teaspoon vanilla, and 3/4 cup confectioners' sugar. Add water 1 teaspoon at a time until you get a fudgy consistency. Frost brownies while they are still warm. 

Everything can be mixed together in the saucepan...efficiency win

Freshly out of the oven and frosted

Tuesday, February 22, 2011

To continue on the lemon theme…

I made this Lemon Frosted Lemon Cake to bring to an epic Female Sexuality meeting (I think it ended up being 10 ½ hours), and it was a big hit. One of my favorite things is too feed people, so this was a fun opportunity to share my food with a group of fabulous (and at some points exhausted and delusional) women. I hope you enjoy this recipe as much as we did!

Lemon Frosted Lemon Cake (from Joy of Baking)

What you need…

Lemon Cake:
1 cup unsalted butter, room temperature
1 cup granulated white sugar
4 large eggs
1 teaspoon pure vanilla extract
Zest of 1 large lemon
2 cups all purpose flour
2 teaspoons baking powder
1/4 teaspoon salt
1/4 cup fresh lemon juice

Lemon Frosting:
1 cup confectioners' sugar, sifted
2 tablespoons fresh lemon juice

What to do…

Lemon Cake:
Preheat oven to 350 degrees F and place rack in the center of the oven.  Butter, or spray with a nonstick spray, a 9 inch spring form pan and then line the bottom of the pan with parchment paper. 
In the bowl of your electric mixer (or with a hand mixer) beat the butter and sugar until light and fluffy and pale in color (about 3 minutes). Add the eggs, one at a time, mixing well after each addition. Beat in the vanilla extract and lemon zest.
Sift together the flour, baking powder and salt and then add to the batter along with the lemon juice. Mix only until incorporated. 
Pour the batter into the prepared pan, smoothing the top with an offset spatula. Bake about 40 - 45 minutes, or until a toothpick inserted in the center comes out clean. Place on a wire rack to cool, then gently remove the sides of the pan.

Lemon Frosting:
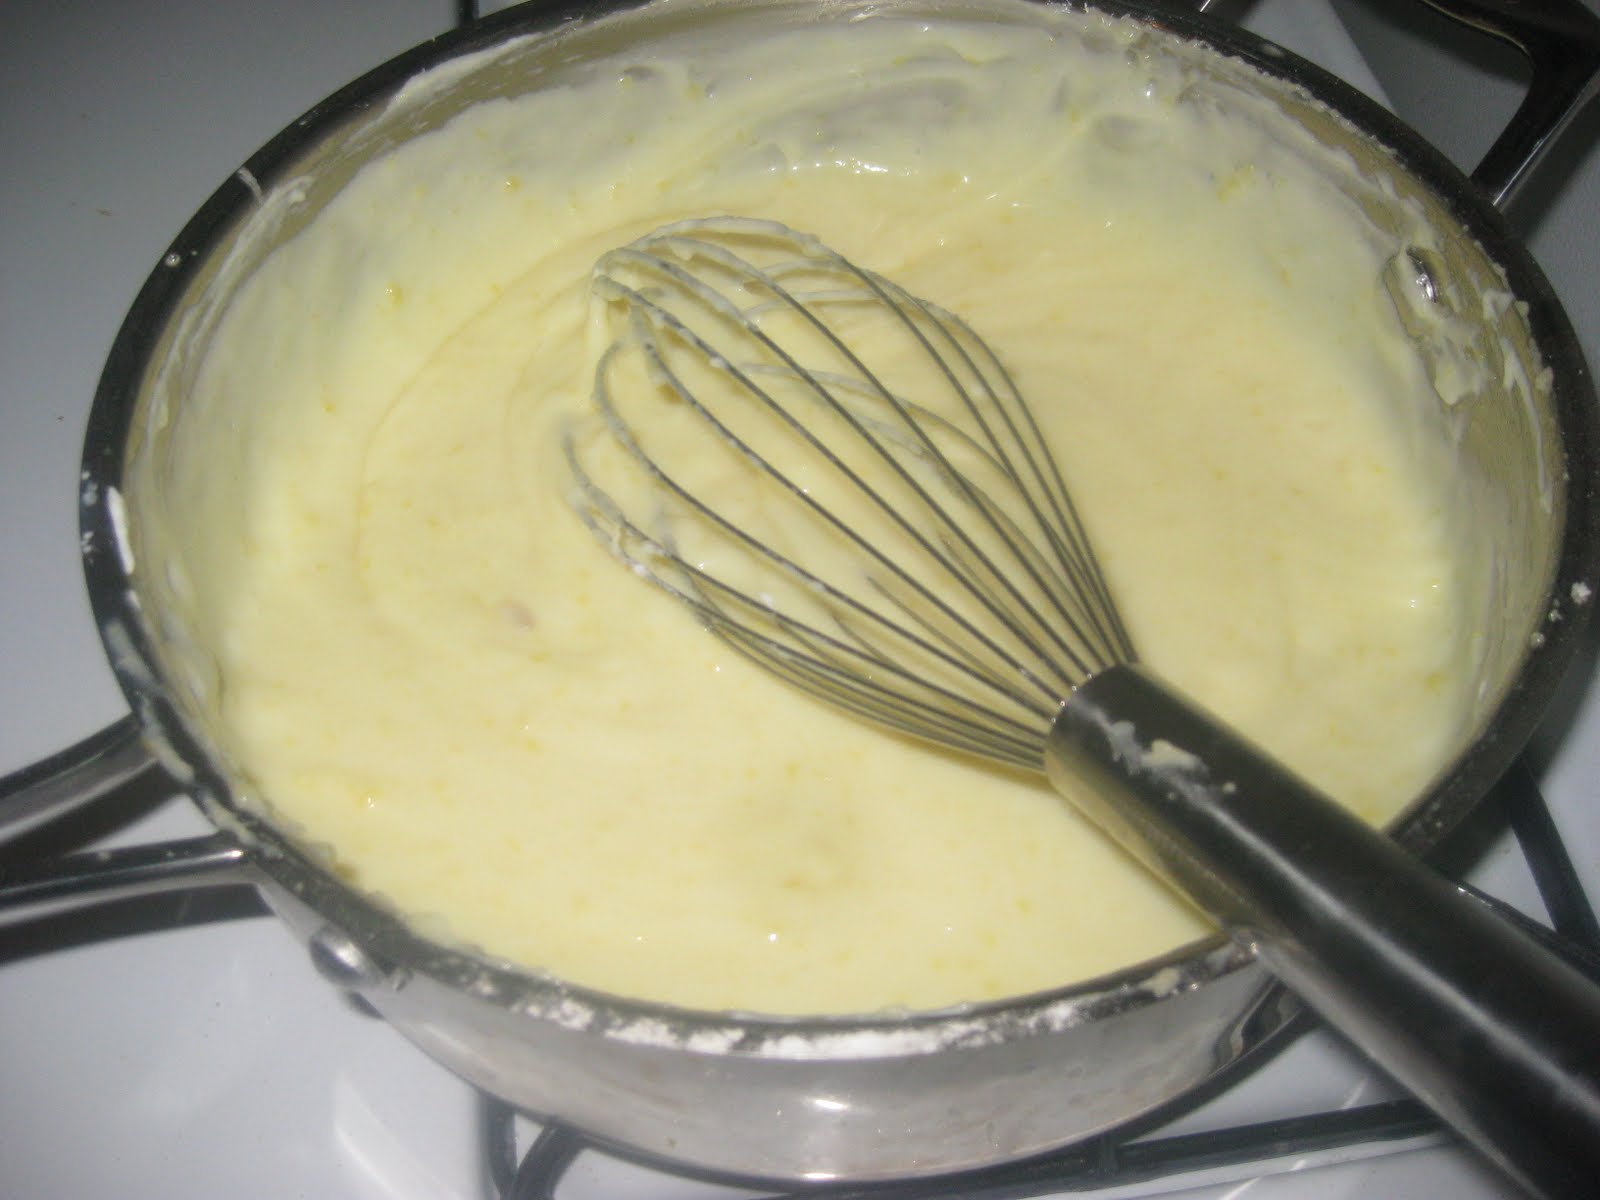
In a bowl, combine the sifted confectioners' sugar with the 2 tablespoons lemon juice. (You want the icing to be thicker than a glaze but still thin enough that it will just run over the sides of the cake. If not the right consistency add more lemon juice or powdered sugar, accordingly.) Pour the frosting over the top of the cake, allowing the icing to drip down the sides. Let the icing set before covering.
Makes one - 9 inch cake.

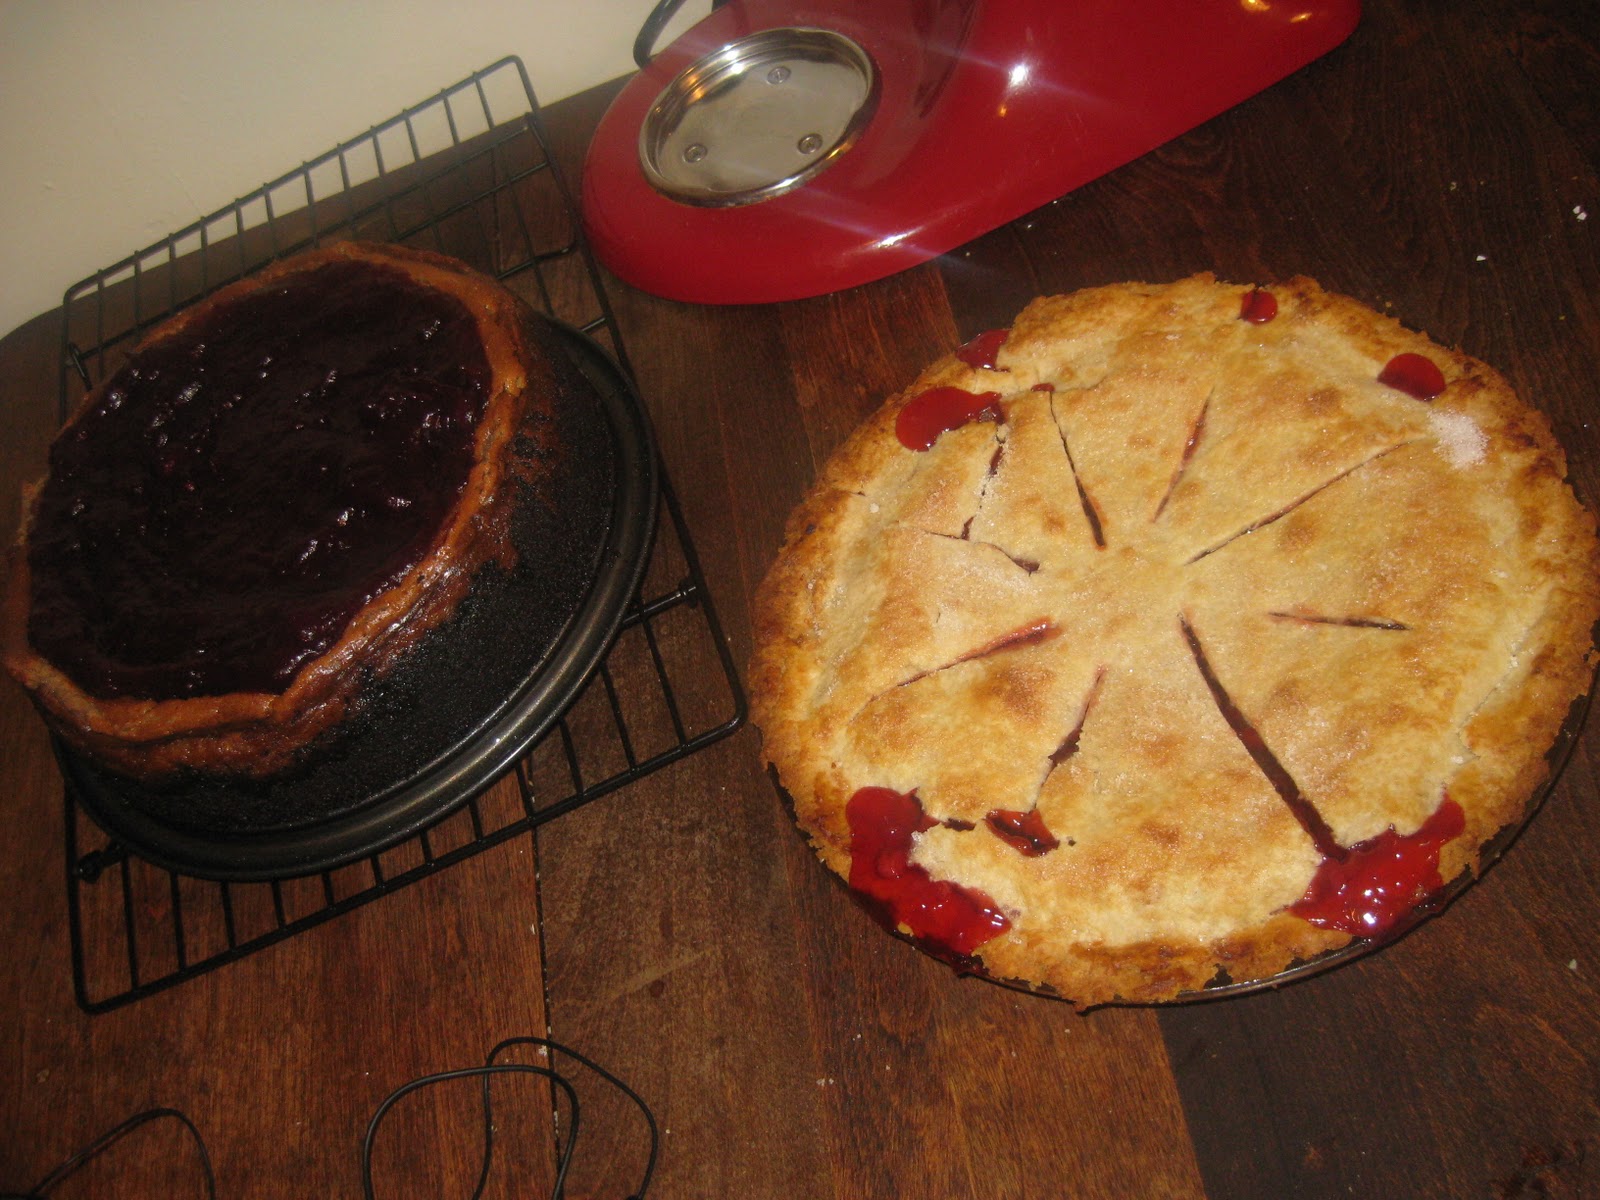
Fresh out of the oven

Frosted!

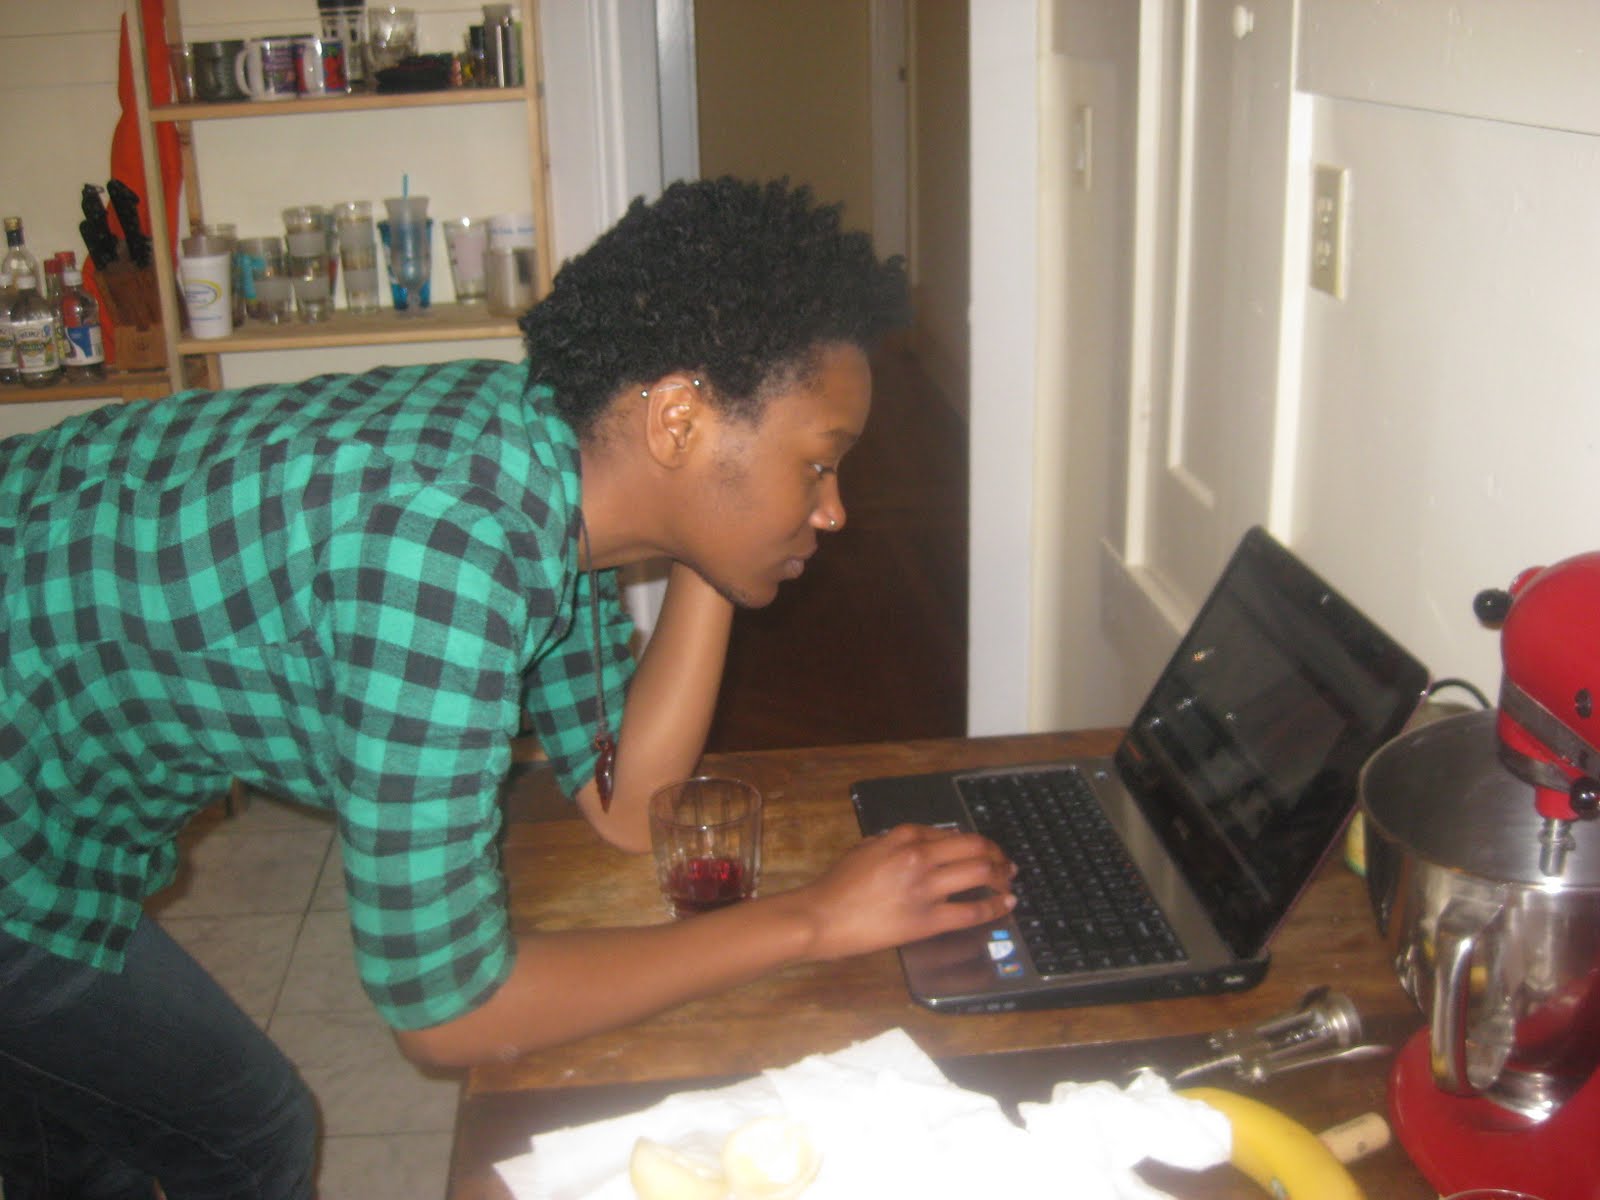
Ariel very excited to cut into the cake


Good food and cofac love: Monica and Tracey


Monday, February 7, 2011

Lemon Blueberry Bread


Upon the arrival of my roommate’s organic fruit box, I was thrilled to see the plethora of lemons that lay in waiting among the apples and oranges. Lemon flavored things are among my favorite to eat, and, as I make what I like to eat, bake with. After opening the box, I went on a search for some lemon-themed recipes and came upon this one for Lemon Blueberry Bread. Blueberries and bread also number among my favorite things, so trying this recipe seemed like a natural. The original site states: “this bread is best served on the day it is made” but I can’t tell you if that is true or not because the bread never made it to day two. If that isn’t a good review, I don’t know what is. 


Lemon Blueberry Bread (from Joy of Baking)

What you need…
1 1/2 cups all-purpose flour
1 teaspoon baking powder
1/4 teaspoon salt
6 tablespoons unsalted butter, room temperature
3/4 cup granulated white sugar
2 large eggs
1/2 teaspoon pure vanilla extract
1 tablespoon grated lemon zest
1/2 cup milk
1 cup fresh blueberries
Lemon Glaze:
1/4 cup granulated white sugar
2 tablespoons fresh lemon juice

What to do…
Preheat oven to 350 degrees F (180 degrees C) and place the oven rack in the center of the ovenButter the bottom and sides of a loaf pan (9 x 5 x 3 inch).
In a separate bowl, whisk together the flour, baking powder and salt.
Beat the butter with a stand or hand mixer until softened (about 1 minute). Add the sugar and continue to beat until light and fluffy. Add the eggs, one at a time, beating well after each addition. Scrape down the sides of the bowl as needed. Beat in the vanilla extract and lemon zest. With the mixer on low, add the flour mixture (in three additions) and milk (in two additions) alternately, starting and ending with the flour. Mix only until combined. Gently fold in the blueberries.
Scrape the batter into the prepared pan and bake for about 55 to 65 minutes, or until the bread is golden brown and a toothpick inserted in the center comes out clean.
Meanwhile, in a small saucepan, bring the 1/4 cup (50 grams) of sugar and the 2 tablespoons of lemon juice to a boil, stirring until the sugar dissolves.
When the bread is done, remove from oven and place on a wire rack. Pierce the hot loaf all over with a wooden skewer or toothpick and then brush the top of the loaf with the hot lemon glaze. Cool the loaf in the pan for about 30 minutes then remove from pan and let cool completely on a wire rack.
Makes 1 loaf.

Incorporating the blueberries into the batter

Love the color of the blueberries with the lemon

Monday, January 24, 2011

Heavenly Buttermilk Lime Shortbread Bars

Lemon bars are one of my favorite desserts, so when I came across this variation, I decided to give them a try. These bars are super simple (especially if you happen to have a food processor) and, as one of my roommates so aptly put, “they taste exactly like they’re supposed to.” The crust is flaky, and the filling delightfully tangy. The only thing that would improve upon the experience of eating these bars would be if I had been sitting by a pool with a fruity cocktail in my hand (if anyone would like to provide the pool and the cocktail, I will bring the bars).


Buttermilk Lime Shortbread Bars (from Baking Bites)

What you need…
Crust:
1 1/2 cups all purpose flour
1/3 cup sugar
1/4 tsp salt
1 tsp vanilla extract
1/2 cup butter, cold

Filling:
4 large eggs
1 1/3 cups sugar
1/2 cup buttermilk
1/2 cup lime juice, freshly squeezed
1 tbsp lime zest
1 tsp vanilla extract

What to do…
Preheat oven to 350F. Get out a 9×9-inch baking pan (or a Baker’s Edge pan, if you have one) and set it aside.

Make the crust. In the bowl of a food processor, combine flour, sugar, salt and vanilla extract. Cut butter into chunks and add to flour mixture. Pulse until mixture forms coarse, sandy crumbs with no piece of butter larger than a small pea. This can also be done by rubbing the butter in with your fingertips. Pour sandy mixture into pan and press mixture down very firmly (with your fingers or the back of a spoon) into an even layer.
Bake for 16-19 minutes, until just lightly browned around the edges.
While crust is baking, prepare the filling by whisking together all filling ingredients in a large bowl or whizzing together in the food processor.

When the crust comes out of the oven and is still hot, pour in filling mixture.
Bake for about 20 more minutes, or until filling is set and does not jiggle when the pan is gently shaken.
Cool completely before slicing.
Top slices with confectioners’ sugar to serve.

Filling pre-oven

Post-oven, pre-powdered sugar

With powdered sugar